
GCB Process: Stars
Hooray, time for stars! I love making stars in stained glass (or any medium anything, really). Since they’re all straight cuts, they’re fairly quick and easy to make, though long thin points can be tricky to cut without snapping the tips off. Plus, they make lovely ornaments (both 2D and 3D).
I created the star patterns with vectors in Adobe Illustrator to ensure they’d be symmetrical with crisp, straight lines (and so that I could resize them easily). I wanted a mix of all sizes and shapes to add visual interest and keep the sky from feeling stagnant or repetitive. I ended up making multiples of each star, choosing the best to set in the window (the rest are still sitting in a box in my workshop, waiting patiently to be made into ornaments). And now, on to the challenge of putting stars in a window…

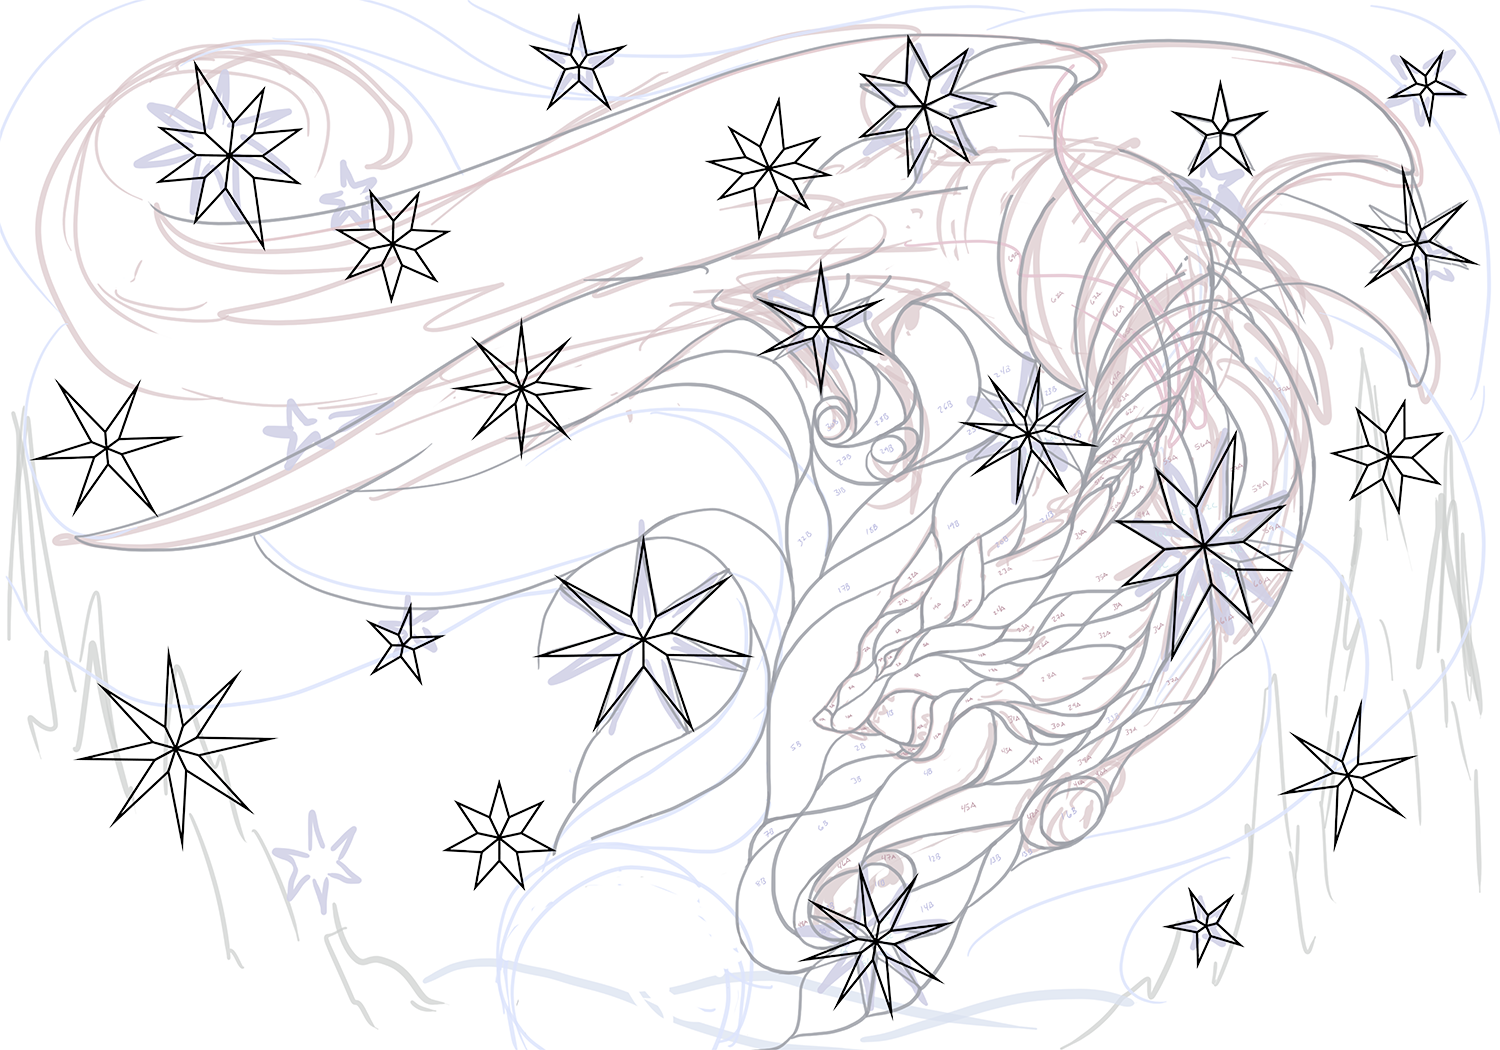
Glass allows no concave cuts (i.e. you can’t cut the triangle of a star point out of a pane of sky) unless you’re using a ring saw (like a bandsaw/jigsaw for glass, which I don’t have). Which means that every star point needs to connect to a solder line, for which you cut one piece of glass to match the L side of the point, and one to match the R side, thereby joining to enclose the point, as illustrated below.

As you can see there were going to be a lot of stars in the final window (not as many as this, in the end, but you get the idea), which would mean a whole lot of connecting lines, and therefore a plethora of tiny, curving pieces, i.e. the hardest things to cut in glass. Which would distract from the intricacy of the Beast’s body and make the window far too busy. So, how to build a starry sky without a mess of solder lines and small pieces?
The answer arrived, as it often does, from somewhere else entirely. In this case: another medium. I’d been painting small star-studies in oils in preparation for another project, and blended soft circles of light behind many-pointed stars (this, in turn, inspired by the late Tomie dePaola’s illustrations). That was it: circles!
Not only would circles communicate an aura of glowing starlight, they’d also alleviate the need to connect every point to a solder line. Plus, the circles would fit harmoniously into the circular sweeps and swirls of sky.
For the circles, I used a gorgeous Youghiogheny mottle that’s a lovely cornflower blue unlit, then blooms into myriad madders, violets, and opal-golds in sunlight. The stars themselves are a mix of iridized clear textures.

The center star of the finished window.
I brought the swirling sky lines into the circle of the central star, as if the whole sky turned around this one point. I roughly soldered all the “star-biscuits” as I came to think of them together (they’d be re-soldered when I soldered the entire window to blend them in with surrounding solder lines) before starting on the rest of the sky, so that I could perfectly match the circles’ curves.

Star-biscuits! They look like fancy linzer cookies, don’t they? Please: do not bite.
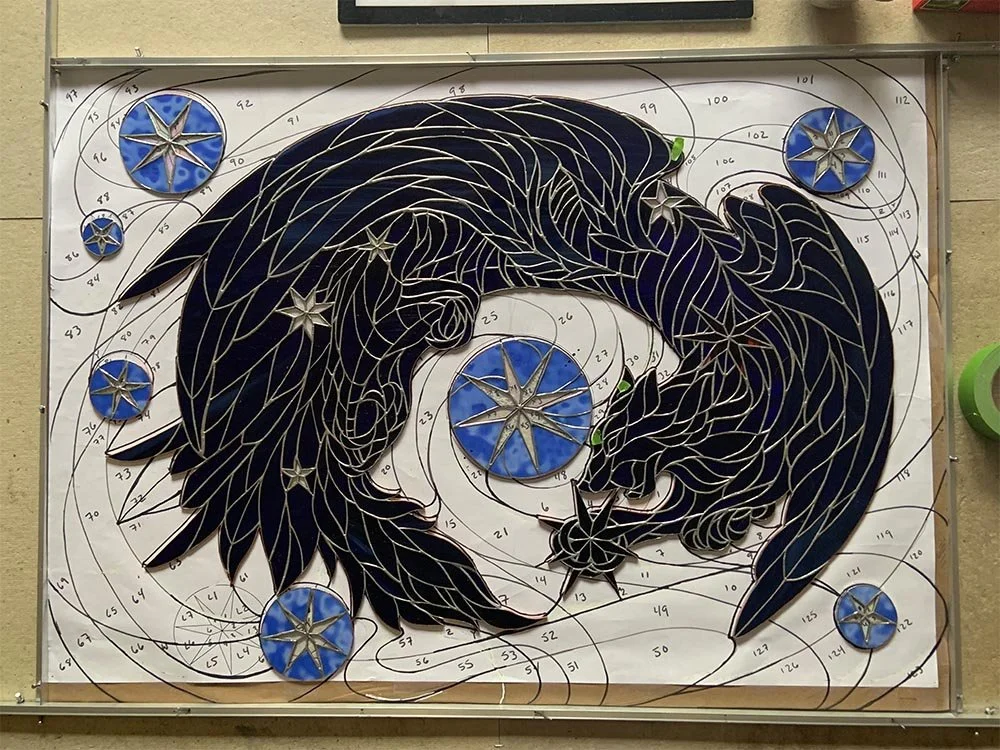
Star-biscuits and GCB in place with the sky pattern and layout frames.
Now it was time to finalize the sky pattern. I knew I wanted a lot of art nouveau-esque lines sweeping and swirling across the sky both for flow and strength, but it took many attempts before I settled on something I liked, both practical and aesthetically pleasing.
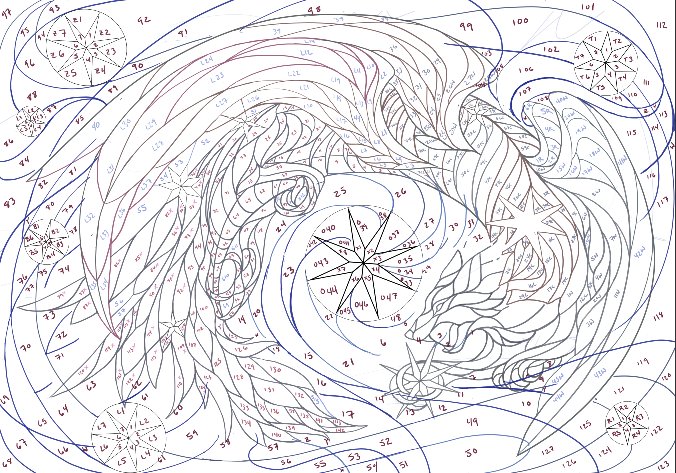
The full pattern (more or less). The numbers/letters mean nothing; they simply keep me from getting confused while assembling each section. I used this pattern mostly for the sky, fitting it with the actual glass as opposed to the original Beast pattern. How many pieces are in the pattern in total? I have no idea. Someone is welcome to count them if they’re bored.
Now onto the sky!