
GCB Process Part III
Finally, we come to the last installment in our series! While the window up to this point took roughly a year and a half (again, not working on it full-time), the sky was completed in about a week.
Before I started cutting glass for the sky, I created color comps, both digital and in colored pencil to help plan the flow of colors/textures. I make all my glass patterns digitally, allowing me to edit and adjust patterns as I go, test colors, and print as many copies as needed.
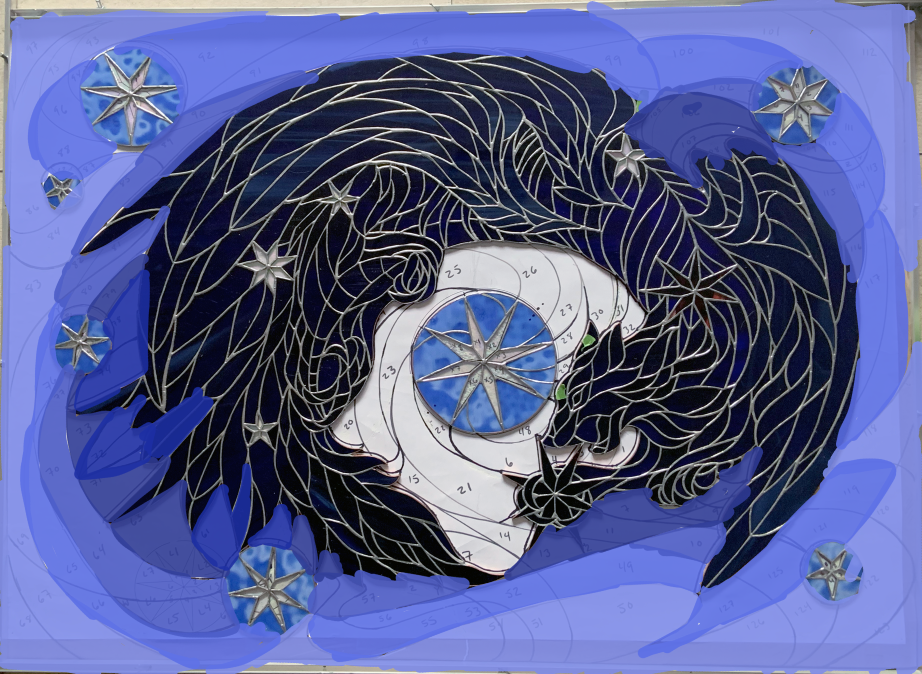
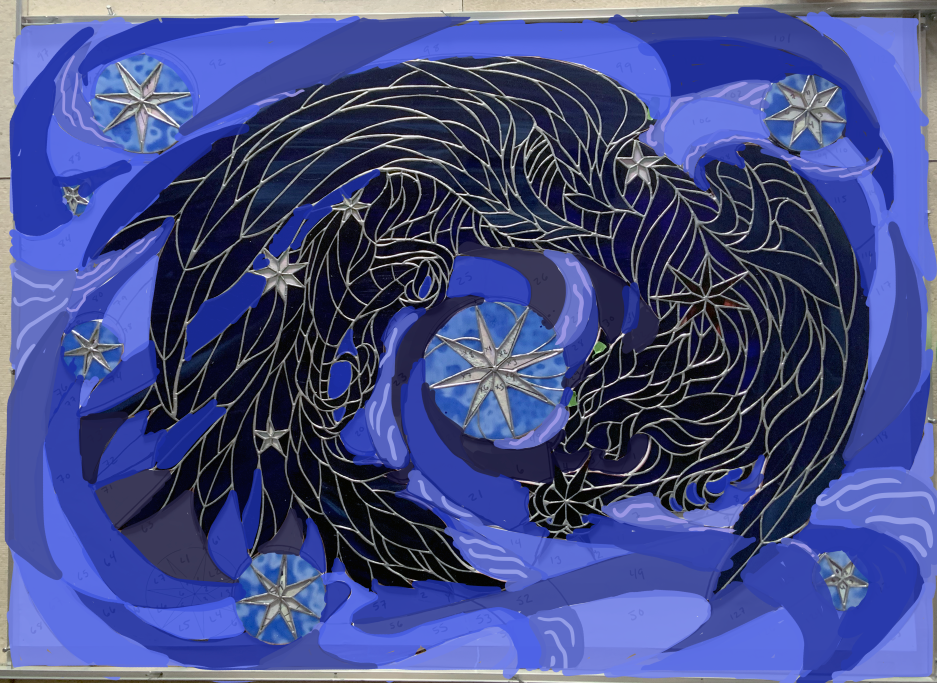
I’ll try numerous colorways at this stage. Above, you can see one idea of an ombre sky. Ultimately, I decided against this, in case glass shattered and I ran out of certain colors. Instead, I opted for a mosaic-type approach as seen below. That way, if pieces broke or I ran out of a color, it wouldn’t be noticeable. I still tried to create continuous sweeps of color so that it wouldn’t look too mismatched and busy, but with enough wiggle room to allow for whatever ideas the glass had (the glass usually knows best).
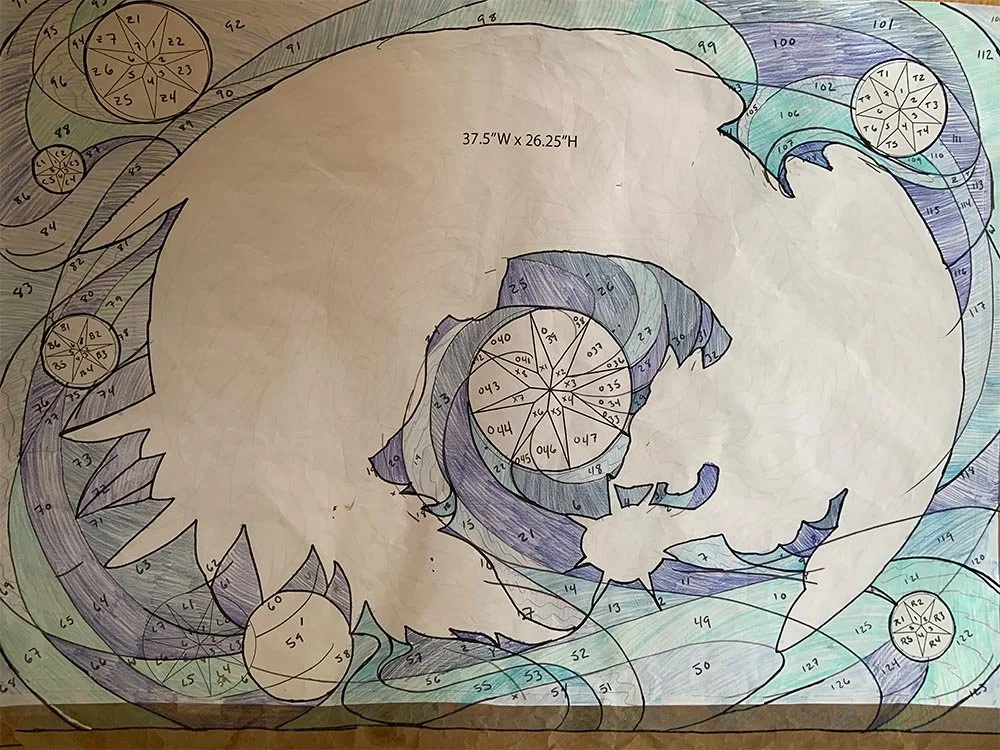
Many stained glass artists use colored pencils to work out color placement, assigning one colored pencil to each color/sheet of glass (I’ll even scribble a scrap of paper with colored pencil and tape it to the glass sheet as a sort of key, so that I don’t get confused later, especially when working with multiple shades of similar color). You can’t create gradients with glass (okay, technically you can, but it’s a whole lot of work, planning, and tiny pieces), which makes watercolor studies tricky. Plus, it makes me feel like a little kid again, sitting on the floor with colored pencils and what’s essentially a giant coloring book page. My dog also thought this was great fun.
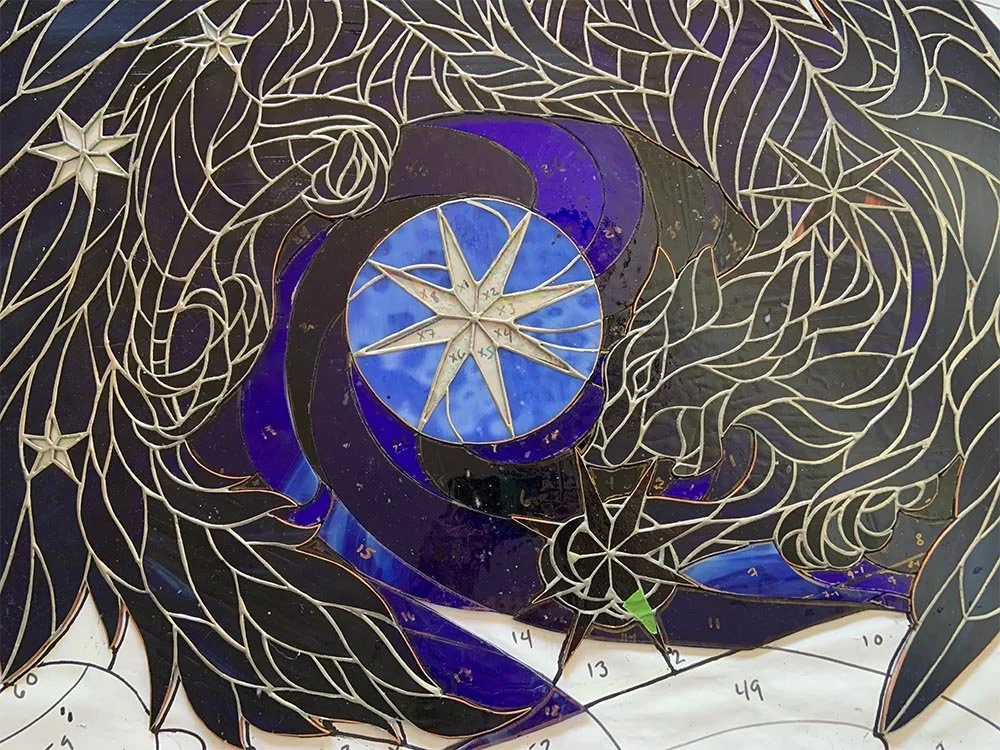
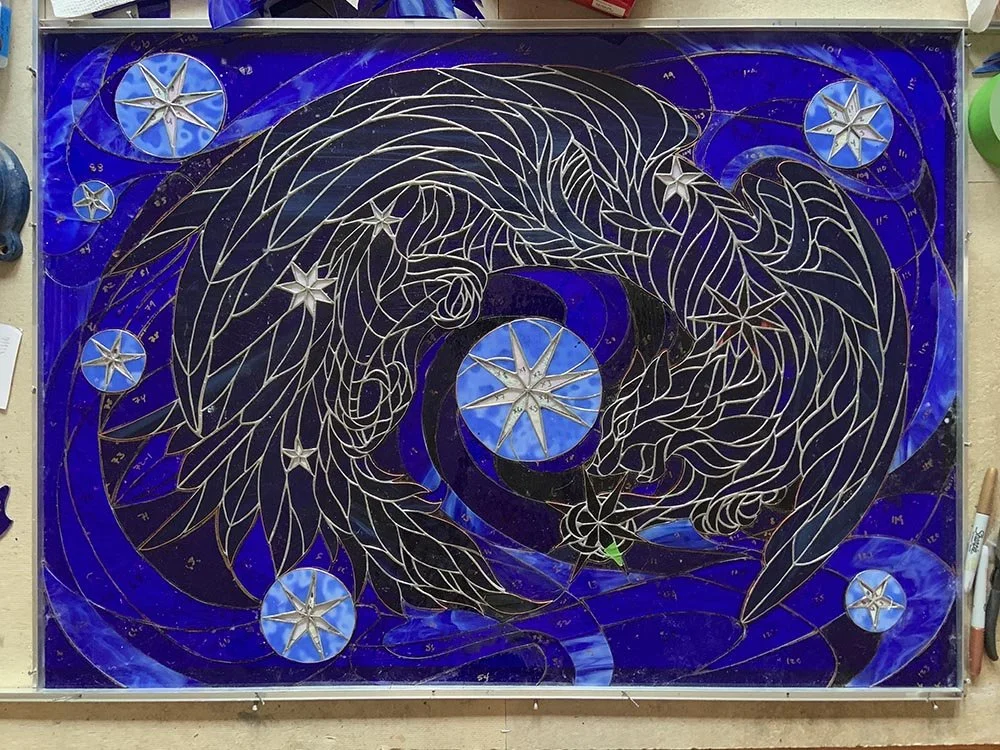
Colors planned I started, as always, with the hardest cuts (i.e. the tightest curves) first. In this case: the center of the sky. Not only was this a tight space to work in, but I also needed the glass to nestle snugly into the Beast’s body, all while matching the swirling lines spinning out from the central star. Thankfully the pieces here were fairly small, giving me more wiggle room and making it easier to re-cut bits from scrap glass.

With the trickiest pieces cut, ground, and tight-fitted, I then started work on the corner and edge pieces. My preferred method is to cut first the hardest pieces, then the borders, and finally the spaces in-between. That way, I can adjust the in-between pieces to fit the existing glass, which may differ slightly from my pattern. Usually I’ll slide a scrap of glass or paper under the existing bits, tracing the needed bit in the gap, thereby ensuring an accurate fit.
This allows me to listen to the glass, which usually has better ideas than I do. I believe all art is collaboration, especially physical media such as glass. Part of being a good collaborator is paying attention and listening. For instance, I may try three times to cut a certain piece, only for the glass to shatter every time. At those moments, I try to take a step back (after much swearing), and pay attention to how the glass wants to break. Maybe that piece would work better as two or three pieces, instead of one? Usually this ends up serving the overall design far better than my initial idea.
As an eternally recovering perfectionist with one or two teeny tiny control issues (ha!), stained glass is both a dangerous medium for me, as well as a good teacher. Try as I might, I can’t control glass. I can ask the glass very nicely to break where I’ve scored it, but despite even scores, good pliers, and much muttering to the glass of “please don’t shatter, please don’t shatter” the glass will ultimately do what it wants. My job is to sit down, shut up, and listen. Only then can we, as the poet Ross Gay says “make beautiful shit together.”
There’s something deeply satisfying about getting a whole window cut, ground, and tight fit together, similar to finishing a jigsaw puzzle and running your hand over the smooth bumply surface. Now to take it all apart, thoroughly clean each piece, re-number, foil, and figure out how to fit them together again.
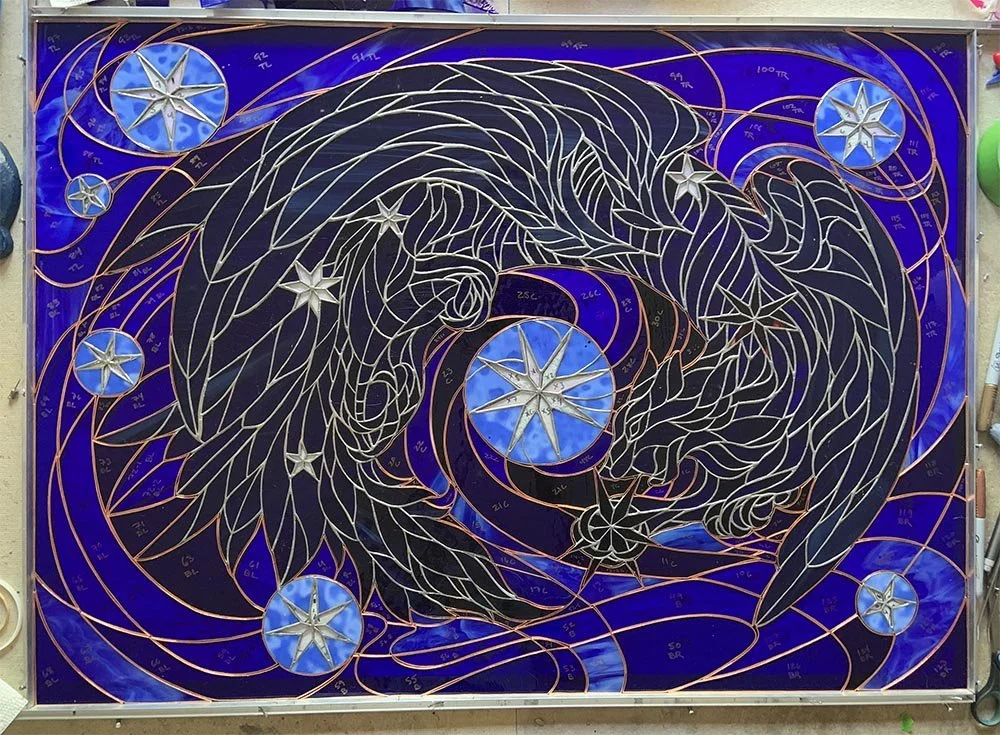
I love with how a glass piece looks fully foiled, but not yet soldered, like a particularly good underpainting that you almost hate to cover up.
Glass is a fascinating medium in this way: fragile yet durable (just look at ancient Roman glass or medieval cathedral windows); solid yet ethereal (how quickly it changes with light, weather, perspective). My glass will likely long outlive me, and though I care not a whit (not one!) for leaving something behind, I enjoy imagining the light it might one day share.
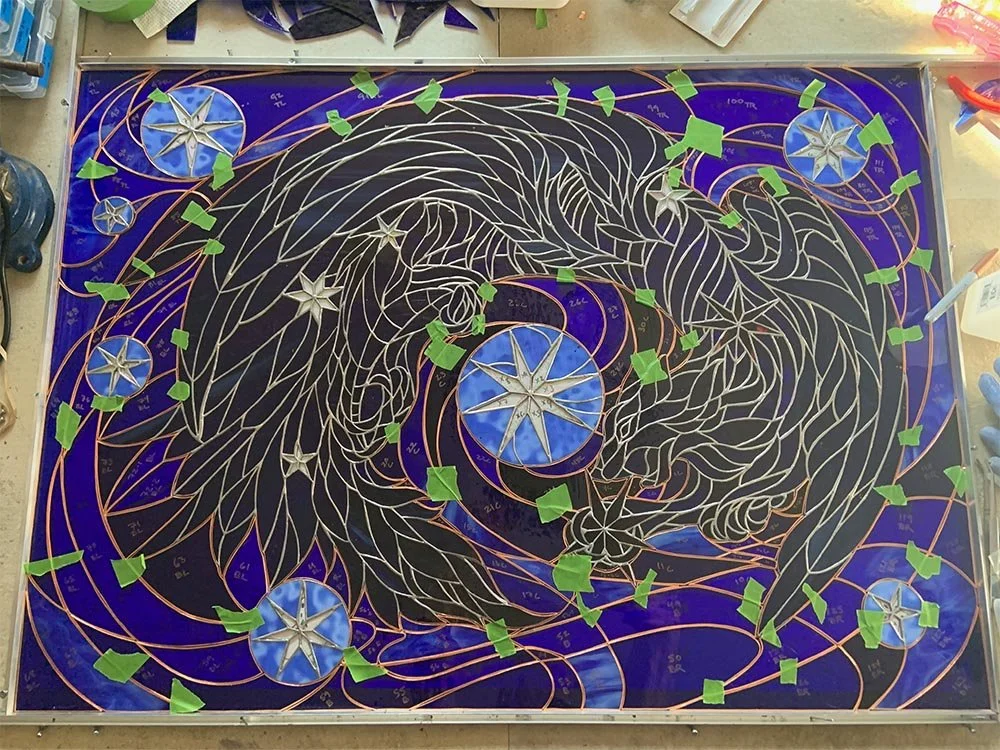
Next up: reinforcement! A window this large should really be made as a collection of smaller windows, but this was very much a learning process.
The green tape shows were I embedded long strips of copper reinforcement between foiled pieces. The reinforcements hide in the solder lines, but add strength and stability to the piece. (Side note: I could write a whole post about the weird and wonderful uses I find for painter’s tape/masking tape in the workshop.)
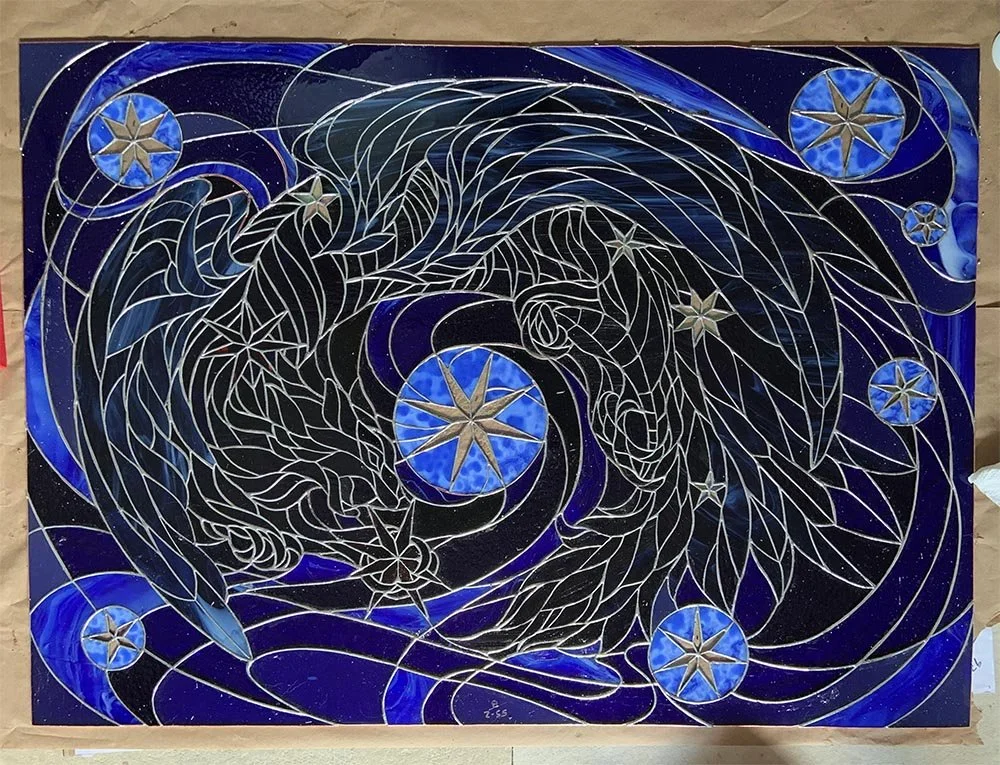
Soldered! Soldering this Beast of a window took roughly a week. I used two large boards to help flip the window between soldering the front and back, terrified that it’d flex and crack.
Soldering finished, my husband helped me thoroughly clean this in our bathtub (quite a sight), using an old milk crate to elevate it and a big sheet of marker board (waterproof) to keep it level while we scrubbed and rinsed. Polishing followed (with a large brush attached to a power drill, because oof is this thing huge), after which we mounted it into an oak frame my husband made. In addition to a woodworker he’s also a blacksmith, and kindly forged iron reinforcements attached to the back of the frame to keep it from flexing. Thank you, strong blacksmith husband!
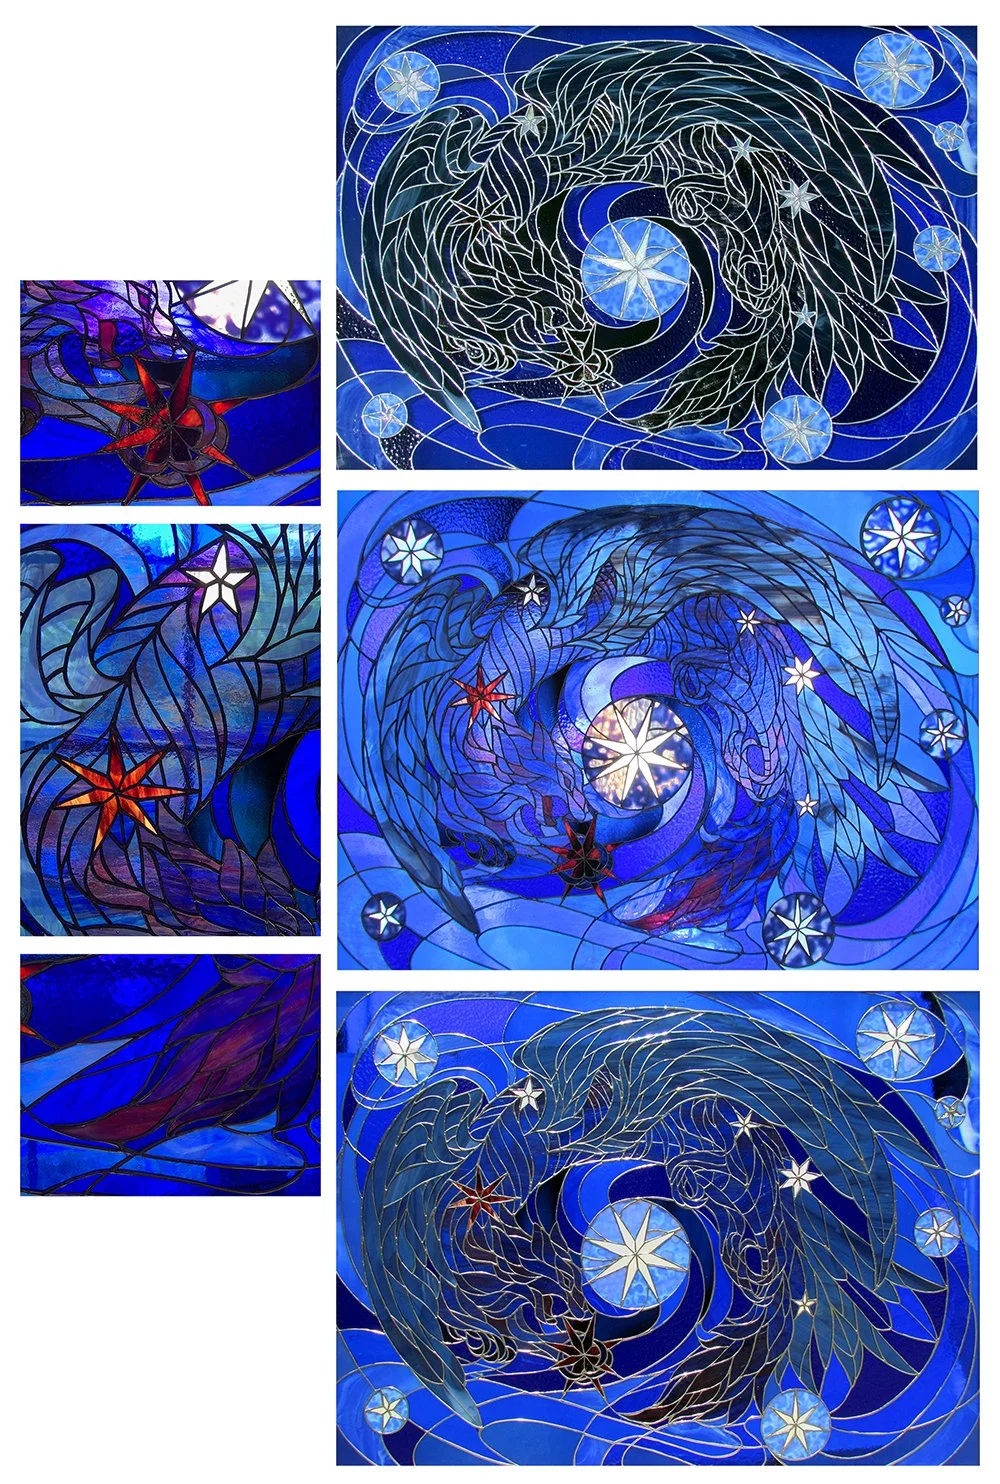
At long last, the completed window, photographed here in a variety of lights, including a few detail shots. I love how the Beast transforms from nearly black to come alive with color in sunlight. Not bad for my first major stained glass project. One day I’ll figure out how to photograph large windows better, but until then, this’ll do.
Now onto the next window!